Showing posts with label appetizers. Show all posts

A Bridal Shower and Pizza Puffs


Last weekend we threw a bridal shower for my sister so I had an opportunity to try a few new recipes. We featured mostly finger foods so guests could enjoy them while playing games and sipping on our signature cocktail for the afternoon. The spread included:

Nummy Pesto Sammie
Pizza Puffs
Double Broccoli Quinoa
Prosciutto & Gruyere Palmiers
Orzo with Everything Salad
Raspberry Lemonade Mini Cupcakes
Brownie Pops


These pizza puffs were well received and I personally enjoyed the bite size pizzas almost more then a regular pizza - which further supports my infatuation for all things cute and little. These would be great to serve for any party as an appetizer and they come together fast. The best thing is they freeze beautifully and your guests will never know :)


The bridal shower was a success and the bride was B&B (beautiful & buzzed) opening gifts and spending her last days as a single woman with good friends.


Pepperoni Pizza Puffs
24 mini pizza puffs
Recipe from Rachael Ray


3/4 cup all purpose flour
3/4 tsp baking powder
3/4 cup 2% milk
1 egg, lightly beaten
4 oz about 1 cup 4-cheese blend (Trader Joes) can sub mozzarella
4 oz pepperoni, small dice
1/2 tsp garlic powder
1/2 tsp dried oregano
1/2 cup Parmesan cheese
1/2 cup pizza sauce (Trader Joes)

In a large bowl, whisk together the flour and baking powder. Mix in the milk and egg. Stir in cheese and pepperoni. Turn oven to 375 degrees and let batter sit for 10 minutes while oven heats to temp.
When oven is ready, stir batter and fill 24 mini-cup greased muffin cups about 3/4 way full – sprinkle tops with parm cheese. Bake 20 - 25 minutes. Serve pizza sauce on the side for dipping.
Note: These can be made ahead of time. Place baked puffs on a baking sheet and put in the freezer until frozen about 25 minutes. Transfer to a storage bag. When ready to eat, preheat oven to 350 degrees, place puffs on a baking sheet, and bake for 8 to 10 minutes or until warm and heated through.


Feta Sun-Dried Tomato Turkey Burger Sliders


Feta, sun-dried tomatoes, and turkey. I don't know why I didn't realize I've made something similar to this in the past. I guess when you try a different recipe for every meal, some of them are bound to overlap - especially when they feature my favorite ingredients. If you've ever tried The Ultimate Meatloaf Sammie or the infamous 50,000 Burger, then you are sure to love these sliders. While the recipes are quite similar, the preparation and condiments are different so I thought it deserved its own NuM NuM post. These little sliders would make great party food and I think all things served in "mini-me" versions always please a crowd - or maybe just pleases me :D


While the burgers were full of flavor, I wasn't really a fan of the slider buns. While they were cute to look at, they were really dense so we removed some of the crumb and turned our sliders into turkey cups, which gave a better burger to bread ratio. These are also delicious topped with Trader Joe's Cheddar Jalapeno Pub Cheese which is HIGHLY ADDICTING if you wanted to forgo the aioli! Enjoy!


Feta Sun-Dried Tomato Turkey Burger Sliders
Adapted from Picky Palate
Makes about 10 sliders


1 Tablespoons extra virgin olive oil
10 oz ground turkey
1/4 Cup + 1 tbs crumbled feta cheese
2.5 tbs sun-dried tomatoes, jarred in olive oil, drained and finely chopped
1/4 Cup+1 tbs fresh baby spinach leaves, chopped
Pinch of Kosher salt, fresh cracked pepper and Garlic Powder with Parsley

Sun-Dried Tomato Aioli
1/4 Cup mayonnaise
1 Tablespoons sun-dried tomatoes, packed in olive oil, drained finely chopped
Baby hamburger buns or dinner rolls, split and warmed (Trader Joe's slider buns)
1/2 Cups fresh baby spinach leaves

1. Place turkey, feta, sun dried tomato, spinach and seasonings into a mixing bowl. Mix until just combined. Make a test patty and cook and check for seasonings. I had to add more garlic powder and S&P. Using a heavy duty baking sheet, remove meat from bowl and pat it down into a square using the baking sheet as your guide to about ¾-inch thick. Using a 2 inch cookie cutter cut out meat. Or you can also use a 1/4 cup measuring cup and shape into little patty’s and place onto a cookie sheet. Once all are formed, place under broiler and cook to 165. To broil burgers, turn the broiler to high in stove and let it heat up for a few minutes. Put the patties on the broiling pan and position the pan about 4 to 5 inches below the broiler. Flip the burgers once the first side gets brown, maybe about three minutes. Cook until the inside reaches the desired temperature. Or you can cook these on a grill or skillet using the 1 tbs of EVOO.

2. Toast buns then place mayonnaise and tomatoes into a bowl; mix to combine. Spread over insides of toasted warm rolls. Layer bottom roll with spinach and the burger. Close with top roll and eat.

Parmesan Puffs


Parmesan puffs, parmesan puffs, parmesan puffs! Warning: these are highly addicting and you will not be able to stop at just one! All will power goes out the window when it comes to these bad boys! Lobster made dinner the other night and served these miniature marvels as our appetizer. They were so delicious, I asked him where he bought them from? To my surprise, he made them from SCRATCH! Yes ladies, the Lobster can bake too. What a wonderful hubby! Okay, I'll stop being disgusting now.


These parmesan puffs are quite similar to the gougeres I've made in the past, but I think they're even better! With the gougeres the cheese flavor is a bit milder since the inside is hollow, but with these babies, they're denser so there's delicious cheesy-ness (is that a word?) all over. Both would serve as a great appetizer, it just depends on the theme of your party. Parmesan puffs: barbecue. Gougeres: cocktail party. Heck.....mix and match and serve them both, 'cuz who wouldn't want to eat a delicious ball of cheese! Enjoy!


Parmesan Puffs

Serves 4

Adapted from All Recipes


  • 1/2 cup milk
  • 1/4 cup butter
  • 1/2 cup all-purpose flour
  • 2 eggs
  • 1 1/2 cup grated Parmesan cheese
  • 1 cup marinara sauce


Directions

  1. Preheat oven to 375 degrees F (190 degrees C). Lightly grease a medium baking sheet.
  2. In a medium saucepan, bring milk and butter to boil over medium high heat. Stir in flour and reduce heat to low. Vigorously stir until thick enough to form into a ball. Remove from heat.
  3. Beat eggs into the mixture until smooth. Stir in Parmesan cheese.
  4. Drop the dough by rounded teaspoonfuls onto the prepared baking sheet. Bake in the preheated oven 15 minutes, or until puffed and golden brown. Serve warm with warmed marinara sauce for dipping.

Note: Lobster would suggest to use less butter then the original amount

Cornbread and Fun Math


If you are like moi and always on the lookout for a tried-and-true cornbread recipe, well look no further because this one's got it all. It's perfectly sweet with a crumbly texture and stays nice and moist during baking. I have one more cornbread recipe in my files, so I'll have to do a taste comparison,- but I'll definitely be returning to this one again and again.


Since it was just Lobster and I eating the cornbread, I made a smaller amount then the recipe called for. I discovered an amazing website that converts any recipe to fit whatever baking dish you have in your kitchen - which will help reduce having to buy a bajillion different pan sizes. You simply figure out the volume of the pan you are using and divide it by the volume of the pan in the original recipe. Multiply that number with the measurement for each ingredient in the original recipe and voila: your recipe is scaled down for you. It may sound a bit daunting, but seriously, math and I have never gotten along, but this is the type of math even I can do.


Here's an example with the pan I used for this recipe. The original recipe called for an 8-inch square pan which is equal to 8 cups in volume. The pan I used was a 1.2 qt baking dish which is equal to 5.76 volume. So you take 5.76 and divide it by 8 which equals .72. Now all you have to do is multiply each ingredient by .72 and you have your new converted amount. In hindsight, I could've just cut the recipe in half and made cornbread muffins, but then how would you have learned this cool new trick :D Apply this method to any recipe you'd like to convert and you'll be excited to do math again. Good luck!


Cornbread

Recipe from Mel's Kitchen

To convert a recipe click here and here


½ cup cornmeal

1 ½ cup flour
2/3 cup sugar
1 tablespoon baking powder
½ teaspoon salt
1/3 cup oil
3 tablespoons butter, melted
2 eggs, beaten
1 ¼ cup milk


Add dry ingredients, make a well and add oil, butter, eggs, and milk into the center. Stir until just mixed (batter will be runny – don’t be alarmed!). Bake in an 8” square pan at 350 degrees for 35 minutes. This doubles perfectly for a 9X13-inch pan.


Honey Butter:
2 sticks butter, softened
1/2 cup honey
1/2 cup marshmallow fluff

Whip all together with an electric mixer and serve at room temperature (can be refrigerated and softened).


Recipe Source: Nate and Kylie


Note: I did not try the honey butter but read great reviews about it.

Pea Pesto Crostini

Pea Crostinis - not to be mistaken for green booties :)


Since I'm on a new healthy kick, I thought I'd make an ass friendly dip to munch on before my meal. Who knew the taste of
sweet peas, tofu (shhh...it's a secret, no one will be the wiser) and a little Parmesan cheese could transform into such an appetizing appetizer. Appetizing appetizer, appetizing appetizer, say that three times fast - I'm having difficulty just typing it.

I don't know why the idea of a pea dip seemed so strange to me. Perhaps since peas are a vegetable they had no place being the star of a dip! I thought: peas in a dip - ew, no way. Yet, I have no qualms eating a spinach artichoke dip - and that's a double whammy of veggies! But after eating these little veggies in a dip I am now a convert! Go ahead, make this dip and give peas a chance :)


Pea Pesto Crostini

Adapted from Gimme Some Oven
Makes 2 cups

  • 1 baguette (sliced thin on a diagonal)
  • 1 (10 oz.) package frozen peas, thawed and drained
  • 1/2 cup extra firm/firm tofu - squeezed dry
  • 1 ounce Parmesan, grated
  • one squeeze of fresh lemon juice, to taste
  • salt and pepper
  • Extra-virgin olive oil, to taste

Method:

Heat oven to 375 degrees F. Toast until golden, about 10-12 minutes. (Watch carefully so they don’t burn!)

Place tofu between paper towels and squeeze as much liquid out as possible

Meanwhile, in a food processor fitted with the metal blade, puree the peas, and tofu. Place mixture in bowl and add parmesan and lemon juice, salt (about 1/2 tsp.), and pepper (about 1/4 tsp.) to taste. I ended up adding more lemon juice, and S&P. If you feel the dip is too chunky or taste a little gritty add olive oil until it reaches the consistency you like.

Spread the pea mixture on the crostini and top with grated Parmesan, if desired.

Superbowl Party Food

The Superbowl is the perfect time to sit around with friends, relax, and munch on some delicious grub! Here are a few of my favorite treats to get you ready for the BIG game! Go Packers!!


Creamy Beet Spread with Blue Cheese and Bacon


I realize this looks like a brighter version of something you'd drink when you have an upset stomach - don't worry, I was a bit skeptical too. But trust me, this dip is fantastic! (Aren't you glad I'm your guinea pig) However, I must warn you though - the color may freak some people out - especially one crustacean in particular named Lobster. I was literally following him around the house trying to get him to eat it. But one bite and he was pleasantly surprised - still scurrrred - but he was hooked.

The vibrant hot magenta hue comes from roasted beets. I personally enjoy eating beets and think they're highly underrated. But if you're not a fan of them, (ahem, W.M. and sister-in-law) maybe this dip isn't for you. But hey, ya never know. There's enough other delicious flavorings goin' on that you may not even notice this humble root vegetable. Like blue cheese and bacon - let's face it, everything's better with cheese and bacon! Sweet, salty, tangy, and smoky all in one bite! Serve this surprisingly delicious Alice in Wonderland concoction to your guests and they will be intrigued and delighted. Fun, whimsical and fabulous! Hope you give it a try :)


Creamy Beet Spread with Blue Cheese and Bacon
Adapted from Food 52 blog via Savour
Serves 3-4

* 2 medium beets
* 1 cup nonfat Greek style yogurt*
* 1.5 ounces blue cheese, finely crumbled
* 2 pieces bacon
* 1 tablespoon chives, finely minced
* Pita bread cut into triangles or baguette slices, lightly toasted

1. Scrub the beets, drizzle with olive oil, sprinkle with salt, enclose in a foil packet and roast at 400 degrees for 40 minutes, or until tender. Let cool, peel off outer layer with paper towel and chop into a fine dice.
2. Fry the bacon until crisp. (Heat bacon slowly so it renders more fat) Let cool, and chop finely.
3. Combine the yogurt and the blue cheese in a small bowl and mash with a fork until the cheese in incorporated into the yogurt.
4. Add the bacon and chives. Add chopped beets. (I would add the beets to taste b/c you do not want the beets to overwhelm the other flavors). Mix thoroughly until the entire mixture is a rather alarming magenta hue. The mixture may be covered and stored in the refrigerator right away, or eaten immediately.
5. Serve with toasted pita triangles or baguette slices. Enjoy.

*I could only find full fat and I did not add chives

Blue Cheese Gougeres


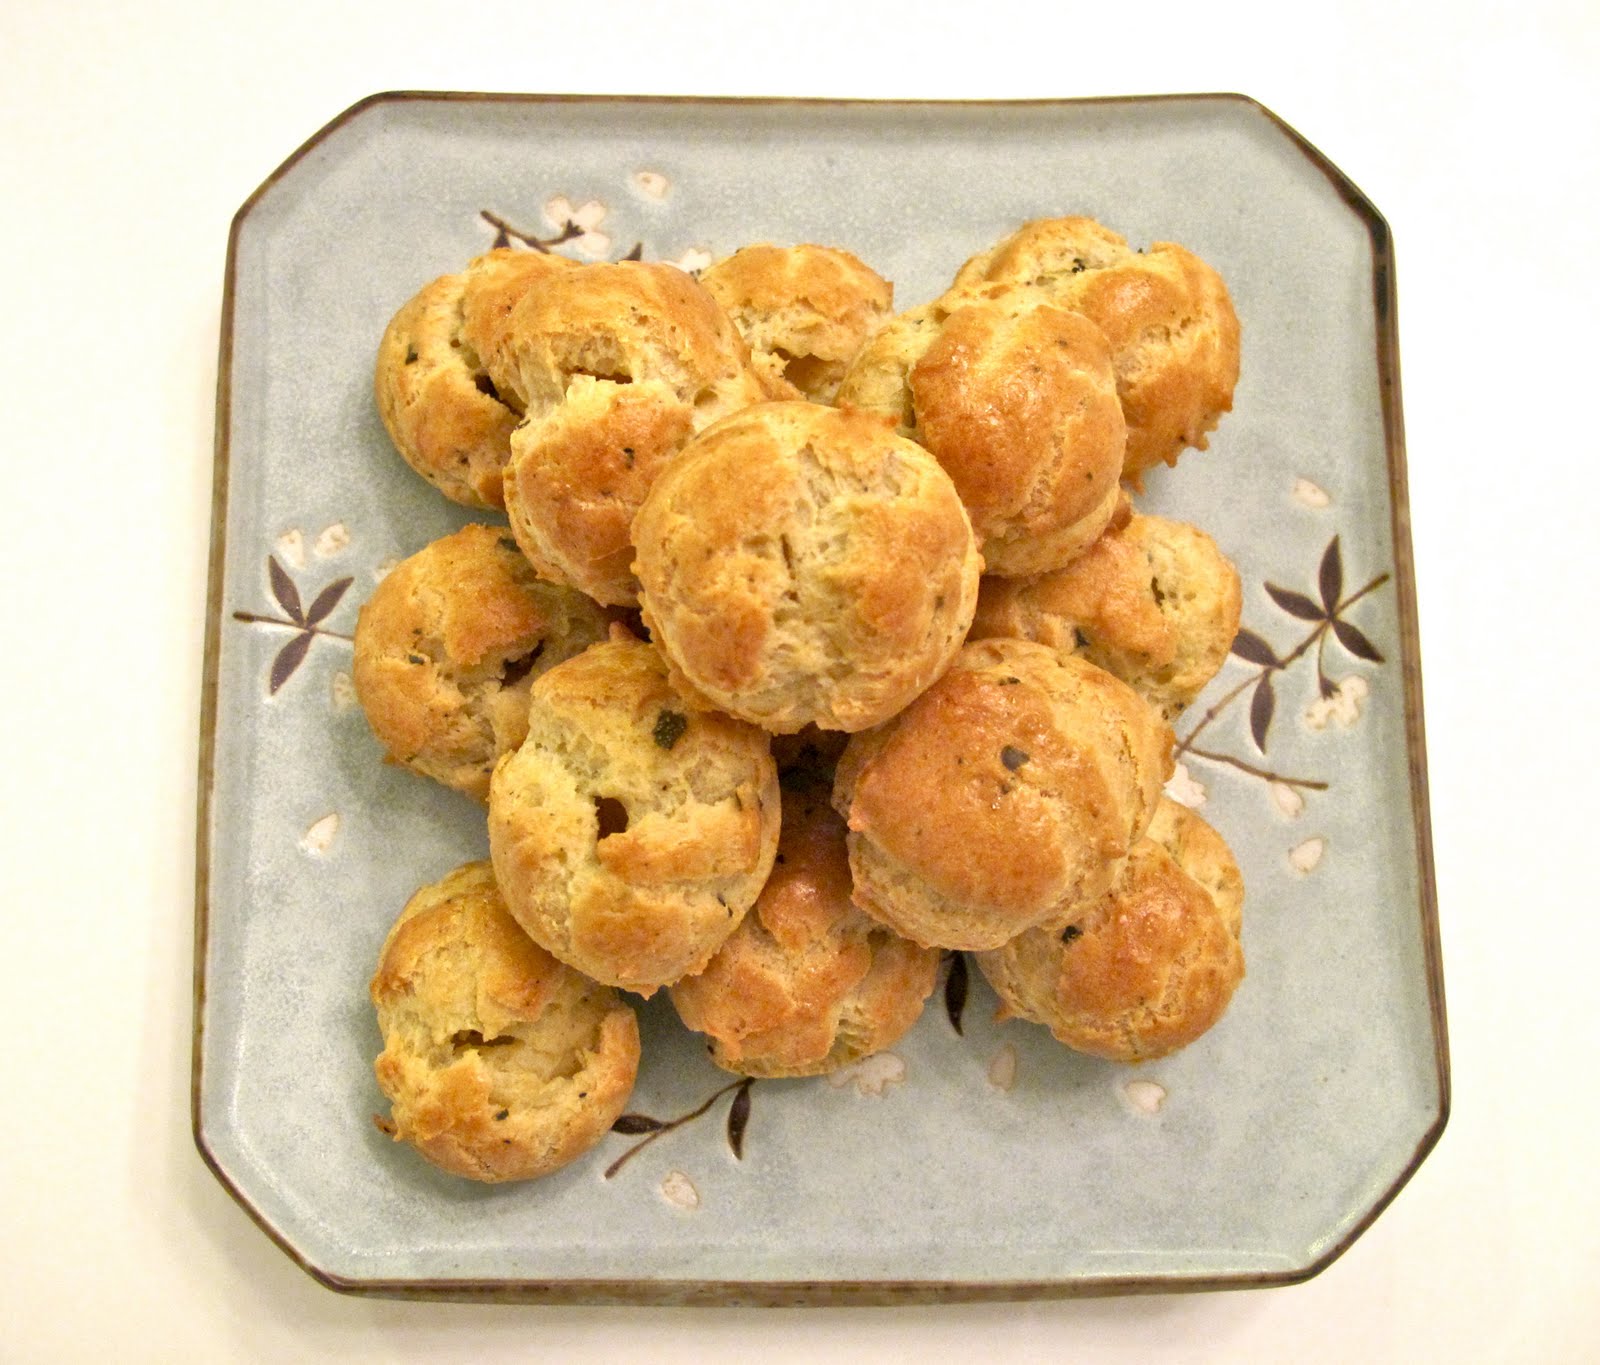
This is an easy elegant appetizer and perfect for your next dinner party. They pair beautifully with a glass of wine and your guests will not be able to get enough. They're actually quite addicting - which became evident after a while since I couldn't stop popping them into my mouth. Try these for your next party and your guests will rave.


Blue Cheese Gougeres
Found on Kitchen Sink

Recipe from King Estate Winery

Makes 35 gougeres


5 tablespoons unsalted butter
3/4 teaspoon kosher salt
1 cup all purpose flour
2.5 large eggs
1/2 cup blue cheese, crumbled (Saint Agur)**
large pinch of freshly ground black pepper
1 egg, beaten


Preheat oven to 425 degrees.

Combine 3/4 cups of water, butter and salt in a saucepan and bring to a boil. Remove from heat immediately and add all of the flour at once, stirring vigorously with a wooden spoon. When the flour is incorporated, return the pan to the heat for several minutes, stirring constantly until the mixture starts to dry out and pull away from the edge of the pan. Away from the heat, add the eggs one at a time, mixing each one until well blended. The dough should be soft and shiny. Add the blue cheese. Season with black pepper and more salt if needed. Continue to blend until mixture looks like one cohesive dough and similar to mashed potatoes.

Line a baking sheet with silpat. Using either small cookie dough scooper or pastry bag with a large plain tip, make mounds about 1 inches in diameter. Using a pastry brush, paint tops with a glaze of the beaten egg mixed with splash of water. Make sure when you glaze the dough to not get egg on the baking sheet b/c they will not rise as well. Bake at 425 for 10 minutes then lower temperature to 375 for 20-25 minutes, or until puffed and golden brown.

For extra-crispy puffs, five minutes before they’re done, poke the side of each puff with a sharp knife to release the steam, and return to the oven to finish baking.


The puffs are at their best when served warm from the oven, but are also delicious at room temperature.


They can be made ahead and frozen, then popped in the oven to reheat just before serving.****


*I made these a few hours in advance and they were indeed delicious when re-heated (10 to 15 minutes in a 350° oven).


**I would even add maybe 1/4 cup more cheese next time


Notes: If the cheese puffs seem like they need a bit more salt - when you reheat them spray tops with PAM olive oil and sprinkle additional salt


Jalapeno Popper Dip


Warning: This could become your new favorite dip! If you enjoy all things spicy and cheesy, you will lovey this! This isn't the most figure friendly appetizer, but I did use reduced fat cream cheese to cut the fat a bit :D

Even though the ingredients list mayo, you can't taste it whatsoever. So if you have any guests who have an aversion towards mayo, do not tell them it's in there since they probably won't want to try it - which I've learned from experience. Serve this with thinly sliced crostini or tortilla scoops and you'll be the hit of the party.


Jalapeno Popper Dip

8 servings

Ingredients:
2 (8 ounce) package cream cheese (room temperature)
1 cup mayonnaise
1 cup cheddar cheese (grated)
1 cup parmigiano reggiano
1 (4 ounce) can sliced jalapenos, drained*
1 (4 ounce) diced green chiles
1/2 cup panko bread crumbs
1/2 cup parmigiano reggiano

Directions:
1. Mix the cream cheese, mayonnaise, cheddar cheese, parmigiano reggiano and jalapenos in a bowl and pour into a 2 qt baking dish (8x8 pan).
2. Mix the panko bread crumbs and parmigiano reggiano and sprinkle over the dip.
3. Bake in a 375F oven until bubbling on the sides and golden brown on top, about 10-20 minutes.

Sprinkle crumb mixture evenly over the dip and bake in a 375° oven for about 20 minutes. You want the top to get browned and the dip to be heated through and bubble gently on the edges. Do not over heat this dish or the mayonnaise with separate and you will have a grease puddle in your dip.

*I like my food spicy so I chopped 4 more small whole pickled jalapenos, sliced them thinly and added them to the dip. I would also forgo the panko and parm topping since I felt like it didn't add much to the dip.


Daring Cooks Challenge: Spinach and Cheese Souffle


My little creations

so proud - standing straight and tall

oh no.....falling

...ugh, man down


"Dave and Linda from Monkeyshines in the Kitchen chose Soufflés as our November 2010 Daring Cooks’ Challenge! Dave and Linda provided many of their own delicious recipes plus a sinfully decadent chocolate soufflé recipe adapted from Gordon Ramsay’s recipe found at the BBC Good Food website."

I've never made a souffle before so this was a new and exciting challenge for me. I'd only heard and seen how tempermental souffles were from clips in the movies. I'm sure you've seen those scenes where someone screams and a souffle collapses in the oven - yup, that was my envision before this challenge.

I'm glad I did a bit of research on souffles before I experimented with my own. During the last few minutes of baking I eagerly stalked watched them through the oven window as they slowly rose above the ramekins. Had I not known they would deflate the second you took them out of the oven - I think I would've gone into depression watching them wilt and collapse into a pile of mush. (Yes, mush is a foodie friendly word) The end result was an egg-y like custard-ish bite as light as a cloud. It was so light and fluffy it literally dissolved in your mouth.

The souffles would make a great dish to entertain with and one your guests will truly enjoy. They'll ooh and ahh once pulled from the oven and provide entertainment as everyone watches them fall to their destined fate. Your guests will feel special having their own personal dish, you'll look like a fancy shmancy cook, and be a kitchen rockstar. It's a win-win situation for all. Bon appetit!


Spinach and Cheese Souffle
4 servings
Adapted from Monkeyshines in the Kitchen


Note: This dish can be made ahead through step 7. Egg whites must be whipped just before the souffles are baked

1 Tbsp butter plus additional for the soufflé dish
1 3/4 Tbsp plain (all purpose) flour
1/2 cup milk
1/4 cup finely grated cheese (I used Kerrygold Aged Cheddar Cheese and Val d' Aosta Fontina)
1/2 cup finely chopped spinach (this measure is the leaves after they’ve been washed, de-stemmed, and chopped)
2 room temperature large eggs, separated
1/4 tsp prepared mustard (Dijon)
1/8 tsp cream of tartar*
Salt and pepper to taste
* If you can’t find cream of tartar, a dash (~ 1/4 tsp) of lemon juice can be substituted

Directions:
1. Butter the soufflé dish(es) thoroughly -for the sides of the ramekin I buttered them using upward and downward motions so this would help the souffle climb - do not butter top of ramekin, then grate a small amount of cheese in each dish and tap so that the sides are completely and evenly coated with the cheese. Place the dish(es) in the refrigerator until needed (according to some sites, this helps the soufflé climb).
2. Preheat the oven to moderate 350º F
3. Wash and chop the spinach if you haven’t already.
4. Finely grate the cheeses
5. In a medium sized saucepan, melt the butter over medium heat, then stir in the flour to make a roux. Cook 1 minute, then add the milk, a little at a time, and stir until just thickened, about 2 minutes. Add the cheese and mustard and stir until it’s just melted. Remove from heat then add the watercress and season to taste with salt and pepper. Let the mixture cool a bit getting it to lukewarm temperature is best.
6. In a larger pan, bring water to a gentle simmer. Whisk the egg yolks in a bowl set just over this water until pale and slightly foamy – about 6 minutes. (I ended up cooking the egg yolks in my first attempt so I just whisked the egg yoks in a separate bowl instead of over water)
7. Mix the egg yolks into the spinach sauce.
8. Beat the egg whites and cream of tartar until they form stiff peaks yet are still glossy.
9. Fold the egg whites into the sauce in 3 additions so that it’s evenly mixed, but you don’t lose too much volume.
10. Remove the soufflé dish from the refrigerator and spoon the mix into it. Use a spatula to even the tops of the soufflés and wipe off any spills around edges and wipe around the edges of the ramekins making a little edge between the souffle and the dish as this apparently makes them rise much neater
11. Bake 25 minutes for small dishes or 40 minutes if using a large soufflé dish, tops should be golden and firm to the touch in the center. Serve immediately.

Buttery Garlic Knots


These garlic knots were the perfect accompaniment to the lasagna I made the other night. Warm and fresh out of the oven, soft in the middle, every bite is full of garlicky goodness. If you thought the garlic bread at Olive Garden was good, these will knock your socks off! They were surprisingly easy to make and highly addicting.


Buttery Garlic Knots
Recipe adapted from Repressed Pastry Chef & King Arthur Flour blog & here
Makes 16 knots

Dough
3 cups bread flour
1/4 cup milk (I used 2% milk)
1 tablespoon sugar
2 teaspoons instant yeast (Rapid Rise Highly Active Yeast)
1-1/4 teaspoons kosher salt
2 tablespoons olive oil
1 cup + 2 tablespoons lukewarm water (warm up water for 8 seconds in microwave)

For the filling/topping...
4 large cloves garlic
2 tbs extra virgin olive oil
2 tbs butter, melted
1 1/2 tsp fresh rosemary, finely chopped
1/4 tsp. sea salt
Pizza Seasoning or Italian seasoning, to sprinkle on top of the knots

INSTRUCTIONS
To make dough—
In the bowl of a stand mixer combine the dry ingredients together then add the olive oil, milk and water. Using the paddle attachment or dough hook, mix and knead to form a smooth, elastic dough, adding additional water or flour (I added about 10 more tbs of flour) as needed. Transfer the dough to a lightly greased bowl, cover it, and allow it to rise for about 1 hour, until it’s doubled in bulk. (I heated a cup of water for 45 seconds in the microwave then put my bowl with the dough inside and closed the door to speed up the process. It doubled its size within 40 minutes)

In a small skillet, melt 2 T butter with 2 T extra virgin olive oil over medium heat. Add the garlic and stir until fragrant but not brown, about 2 minutes. Add the sea salt and mix well. Divide the butter mixture into two bowls. Add rosemary to one of the bowls and use it as the "filling" to glaze over the dough before you knot them. Use the other butter bowl as the glaze when the knots are done baking. Remember to scoop from the bottom of the bowl so the garlic pieces are on top of the knots along with the butter. Finish with a sprinkling of pizza seasoning.

Shape the dough into a rectangle 16" long and 8" wide and flatten dough to 1/2 inch thickness. Divide the dough into 3/4 to 1 inch intervals using a pizza cutter or sharp knife and then divide dough evenly in half vertically. Take each piece and taking the palm of your hand flatten dough to about a 1/4 inch in thickness and spread rosemary butter over dough. Fold dough in half lengthwise and press edges together (taking top part and folding it over bottom half like you would a sheet of paper) then roll into a rope about 10 inches long like this website. If dough is sticking to board or is too wet then add a sprinkling of more flour so it will be easier to work with. Tie each rope into a knot, tucking the loose ends into the center. Place the knots on a lightly greased or parchment-lined baking sheet, cover loosely, and let rise for 45 minutes to about an hour, until very puffy looking. (After tying the dough into knots I put them in the fridge over night. An hour before I was ready to serve I removed them from the fridge so they could come to room temperature and then put them in the oven. They did not puff up but stayed the same size)

Before the end of the last rise, preheat oven to 350 degrees F.
Bake the knots for about 14-18 minutes, until golden. You do not want them to get too crisp since they should stay soft in the middle. Remove from oven and brush with remaining garlic butter mixture and sprinkle tops with pizza seasoning. Serve rest of sauce as dip.

Feta wrapped in Phyllo Dough with Honey and Roasted Figs


Dessert or appetizer? Either way you serve it, this was delicious!! Sweet and salty - my favorite! I served this dish as an appetizer, but it's so sweet and decadent you could just as easily have this for dessert. Each bite gives you a sweet and salty party in your mouth - but nothing beats that first bite. Once you stick your fork into the phyllo, you hear a nice crunch and the cheese begins to ooooooze. Then, once you put the whole thing in your mouth, you get a hit of salty goodness from the cheese, crunchyness from the phyllo dough - take all that deliciousness and mix it with the honey and sweet roasted figs - it's the perfect combination of textures and flavors...NUM! Did I describe that well enough for you?! :D Run, don't walk to eat this plate of delicious yummyness. It's a guilty pleasure, but one worth all the extra calories. Pure decadence!


Feta wrapped in Phyllo Dough with Honey and Roasted Figs
Recipe from Food Network
6 servings

* Phyllo pastry sheets from 1 frozen package (recommended: medium or thick style, if available)
* 1 1/2 pounds Greek feta cheese, in block form
* Vegetable or sunflower oil, for frying
* 3/4 cup Greek honey
* 2 tablespoons black sesame seeds
* 1 small jar candied figs, or fig jam

Directions

Thaw the frozen phyllo pastry sheets in the refrigerator overnight, and then bring these to room temperature prior to use for easier handling.

Drain the feta cheese from the brine. Cut the block of feta using a thin, sharp knife into 6 slices, approximately 2 by 4 inches and 1/2-inch thick. Set the slices on a clean kitchen towel to dry.

Lay the phyllo sheets on a flat surface and cut with kitchen scissors or a small sharp knife to size. They should be cut into rectangles, approximately 8 by 12 inches. Use a ruler if needed.

Lay 1 cut piece of phyllo in front of you like a sheet of wrapping paper - the 12-inch length top to bottom. Place a slice of feta at the top end of the sheet slightly below the edge and wrap it up as you would a small package. Fold the top end of the sheet over the feta and then fold the left and right sides over. Flip the partly wrapped feta down the sheet towards you until it is fully wrapped. If needed, a little water can be used to seal the last edge of the sheet onto itself.

Set aside with the sealed edge on the bottom of the package so the weight keeps the phyllo closed. Do not stack packages on top of each other. Continue to wrap all the pieces of feta.

Heat the oil to 350 degrees F in a deep sided skillet using sufficient oil to float the package, about 3 to 5 inches of oil. Fry to a golden brown, about 5 minutes on each side. The pastry should puff up slightly. Remove with tongs or a slotted spoon and drain on a paper-towel lined plate.

Serve each package on an individual plate or, if on a serving platter, do not stack the packages. Drizzle each package with about 2 tablespoons of honey and sprinkle with a teaspoon of black sesame seeds. Top with cut roasted figs.

Cook's Note: Uncooked packages can be frozen for later use. If freezing, dust lightly with cornstarch or flour to help keep them separate.


Honey Roasted Figs

Ingredients:
1 lb. fresh figs

1. Preheat the oven to 375 degrees.
2. Wash, slice, remove stems from figs. Quarter the figs and arrange in baking sheet sprayed with PAM.
3. Roast for 8-10 minutes, or until they begin to brown.

Greek Patty Melt with Cotija Cheese and Muhammara

You know you've made something delicious when you take a bite and your first reaction is mmmmm! I LUV it when that happens! Mmmmms = happy dance = a happy blogger. This burger was well received and is now a new fave! Each bite packs a flavorful punch and the muhammara is absolutely amazing. I could have eaten it straight up all by itself. Gimme a bag of pita chips and I would've been a happy girl. The sauce reminded me a lot of my other favorite dip - but this one's even better. It was a perfect compliment to the bold flavors of the meat and the combination of flavors just made these burgers sing!

I learned a great cooking tip while making these burgers as well. The recipe uses Greek yogurt to bind the burgers which I thought was a unique twist, since normally I use an egg to bind any type of ground meat. I found the yogurt held the burgers together well and they showed no signs of falling apart on the grill. How many times has that happened to you when you try to cook a burger on the grill? Well have no fear, yogurt is the new binder and you'll have a perfect burger every time. Try it, I think you'll be pleasantly surprised. The yogurt also acts as a double-duty ingredient - it not only keeps the burger together, but also adds moisture which keeps the burger juicy and moist. If you enjoy Mediterranean cuisine and big bold flavors, then you'll definitely enjoy these burgers!


Greek Patty Melt with Cotija Cheese and Muhammara

Adapted from Grill It with Bobby Flay

2 servings

  • 1/4 cup finely chopped parsley leaves
  • 3 tablespoons fat-free Greek yogurt
  • 1 cloves garlic, minced
  • 1 teaspoons ground coriander
  • 1/2 teaspoon kosher salt
  • 1/4 teaspoon ground cumin
  • 1/4 teaspoon paprika
  • 1/8 teaspoon ground allspice
  • 10 oz pounds ground turkey
  • Olive oil
  • 2 Hamburger buns
  • 1/2 pound cotija cheese, grated (can substitute feta)
  • Muhammara, recipe follows
  • 1 large onion, thinly sliced and grilled

Directions

Preheat a grill over indirect medium-high heat.

In a large bowl, combine the parsley, yogurt, garlic, coriander, salt, cumin, paprika, and allspice. Add the lamb and mix gently by hand until evenly combined. Shape the meat into 2 patties, each about 4 by 6-inches by 1/2-inch.

Lightly oil the patties and arrange them on the hot side of the grill. Cook for 4 to 5 minutes, flip, and cook another 4 to 5 minutes until cooked through. Top burgers with cheese in last few minutes of cooking until cheese gets nice and soft. Transfer the burgers to the bread, top grilled onions and Muhamarra.

Muhammara:

  • 1/2 pound red bell peppers, charred, peeled, seeded and roughly chopped
  • 1/2 to 1 small hot red peppers, charred, peeled, seeded and roughly chopped*
  • 1/2 cup walnut pieces, about 5 ounces, toasted
  • 1 clove garlic, roughly chopped
  • 1/2 teaspoon ground cumin, from freshly toasted seeds
  • Kosher salt
  • 1/4 teaspoon smoked paprika
  • 1 tablespoons olive oil
  • 1/2 tablespoon pomegranate molasses
  • 1/2 tablespoon sherry vinegar
  • 1/4 lemon, zested and juiced
To char the bell peppers, cut each pepper in half and cut out the inside membrane and seeds. Next take your palm and flatten the pepper cut side down and make it as flat as possible. Place the pepper cut side down on a baking sheet that you spray with PAM or lightly oil and broil for 10 minutes or until peppers are black and charred. Remove peppers and place in a bowl and cover tightly with plastic wrap. After 15 minutes remove peppers from bowl and peel off black skin. Do the same thing with the peppers if you decide to use them. Next, put all of the ingredients, except the lemon zest, in a food processor and process until a smooth paste forms. (Start with 1/2 hot pepper, taste, and then add more if you want it hotter.) If the mixture is too thick, drizzle in a little more olive oil. Stir in the lemon zest by hand. Taste and add more salt and hot pepper, if desired.

*I omitted the pepper and added a pinch of cayenne.

Healthy Spinach Parmesan Dip and Pita Chips


This is my favorite spinach dip and one I hold near and dear to my heart. Didn't you know dips can have that affect on you? In actuality, this is one of the first things I ever made when I began cooking and I've been making it ever since.

Spinach dip is one of those classic appetizers everyone loves, but usually it leaves you feeling heavy and guilty after consumption. My version is lightened up a bit using yogurt and cream cheese which makes the dip thick and creamy. This would be perfect for your next tailgating party since football season is around the corner and the men are coming out of hibernation.


Pita Chips

* Pita bread
* PAM Spray
* kosher salt

Preparation:
Preheat oven to 400 degrees.
Brush pita bread with olive oil and sprinkle with kosher salt.
Cut each loaf into eight triangles.
Bake in oven for 5 minutes. Remove from oven


Spinach Parmesan Dip
**Sorry I don't know where I got this recipe from since it's been so long
Makes 2 cups
1/4 cup = 64 calories

1 teaspoon olive oil
3 garlic cloves, grated
1/4 teaspoon salt
1 (10-ounce) package frozen spinach
1/2 cup basil leaves, loosely packed
1/3 cup (about 3 ounces) 1/3-less-fat cream cheese, softened
1/8 teaspoon black pepper
1/3 cup plain fat-free yogurt (can substitute Greek yogurt)
1/4 cup (1 ounce) grated fresh Parmesan cheese

Defrost spinach and squeeze out excess water. Heat olive oil in a large skillet over medium-high heat. Add garlic; sauté 1 minute. Add salt and spinach; sauté 3 minutes or until the spinach is warmed through.
Place spinach mixture, basil, cream cheese, and pepper in a food processor; process until smooth. Spoon spinach mixture into a medium bowl. Add yogurt and Parmesan; stir to combine. Chill.

**If you want to make the dip a little fancy - serve it in little bite sized phyllo cups.

Ingredients:
3 sheets frozen phyllo dough, thawed
Parmesan cheese

Preparation:
Preheat the oven to 350 degrees. Melt 1 tablespoon butter. Place 1 phyllo sheet on a clean surface (cover the other sheets with a damp towel), brush with melted butter and sprinkle with 1 teaspoon parmesan. Cover with another phyllo sheet, brush with more butter and sprinkle with another teaspoon parmesan. Top with the remaining phyllo sheet and brush with butter. Cut the phyllo stack into 24 squares, about 3 inches each. Brush a 24-cup mini muffin tin with oil, then firmly press a phyllo square, buttered-side down, into each cup. Bake until golden, 10 minutes

Spoon about 1 tablespoon filling into each phyllo cup. Bake until the filling is set, 15 minutes. Cool slightly in the pan and serve

Spinach on FoodistaSpinach

Arabic Falafel Balls


"Beans, beans, they're good for your heart. The more you eat the more you....hopefully won't flatulate." Since we had kefta the other night, I thought I'd round out the meal and make falafel balls. I really enjoy the flavor and texture of falafel so I thought it would be a great addition to the meal. I've made falafel before but I wanted to try the real deal and use dried chickpeas, not the canned ones. While I was at it, I thought it would be nice to try a different recipe too. I scoured the Internet and found a recipe called "The best falafel EVER," and they were indeed tasty. I couldn't tell if using fresh chickpeas made that much of a difference but it seemed like every recipe I looked at said you should use fresh, so that's what I'd recommend. I have to warn you though, you must have a heavy hand when adding your seasonings. My first few tester patties were tasteless and bland but after I added A LOT of S&P, I could tell I was liking them more since the patties were strangely getting bigger and bigger. The end result was a tasty falafel - crisp on the outside and soft in the middle. I thought it would be nice to serve them with a spicy dip so I made one flavored with sriracha sauce. If you've never tried Sriracha before, it is HOT so beware! It was a nice finishing touch with just the right amount of heat. Enjoy!


Arabic Falafel Balls
Adapted from Hummus 101 Blog
Makes 25 falafel balls

2 cups of dried chickpeas, soaked in water for 12 hours = 6 cups cooked chickpeas
Crumbs from 2 slices of white bread
5 cloves of garlic
2 teaspoon baking soda
1/3 cup chopped parsley
1/2 cup chopped coriander
1/2 small onion
1 teaspoon cumin spice
1 teaspoon smoky paprika (pimenton)
Salt, pepper, Cavenders Greek Seasoning

Preparation:
1. Pulse garlic, herbs, and onion in food processor to a fine mince.
2. Wash and dry the soaked chickpeas and add half to food processor along with the spices. Pulse a few times until you get a fine mixture, but not pureed. Empty the bowl and add the remaining half of the beans and pulse the same way.
3. Add mixture to bowl with the rest of the pureed mixture. Add baking soda and bread crumbs to mixture and mix thoroughly.
3. Season generously with lots of salt, pepper, and Cavenders. Make tester patty and adjust falafel to your own taste.
4. Once you are content with the taste add a bit of water making one homogenous mixture - batter should be pretty wet (just wet enough for everything to be pretty combined) but not drowning in water. Put mixture aside, covered, for 30-60 minutes or put in fridge for longer.
5. Wet your hands and shape into a disc 1-1/2 inch wide and 1/2 inch thick. If moisture seems too wet, squeeze out a little moisture through your hands. Don't be skeptical if the batter seems too wet like I was, it will dry up and the falafel will stay together in the oven.
6. Pre-heat oven to 375F. Spray cookie sheet and put patties on top and cook for 18-20 minutes flipping half way in between. Bottoms should be nice and brown and crispy.

*If you would like to freeze the falafels - bake then freeze and store in individual servings. Remove from freezer and bake in oven.